
How to Set Up an Online Store on Shopify: A Step-by-Step Guide for 2026
- August 21, 2026
-
365admin2015
- Outsourcing
 6 mins read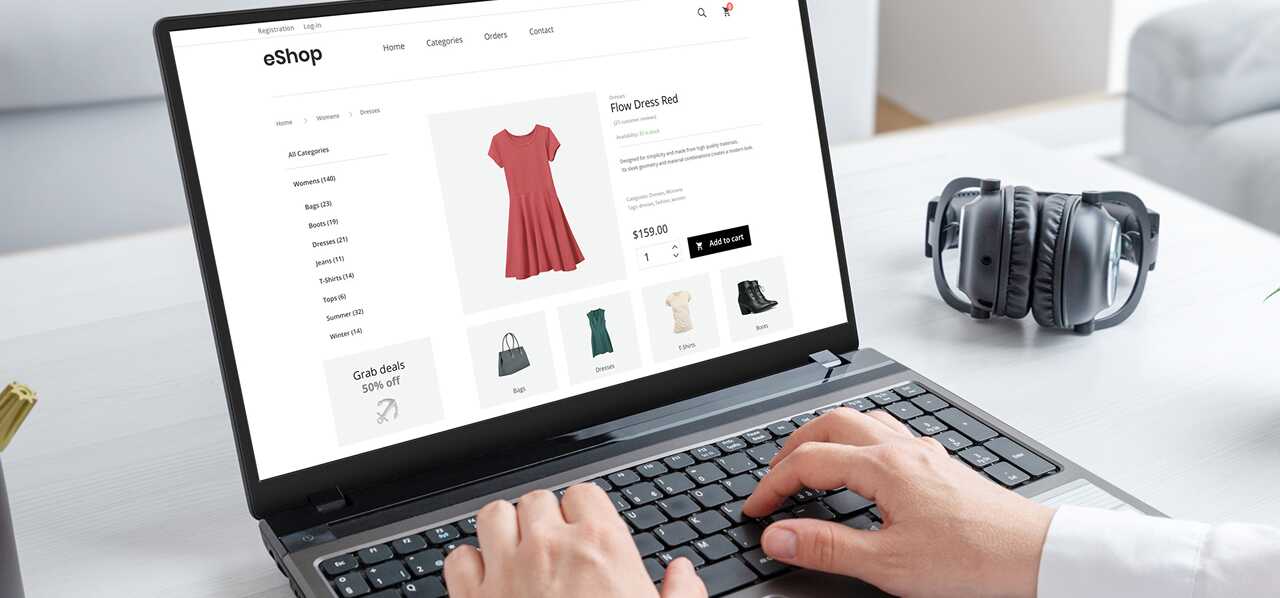
Shopify remains the most widely used ecommerce platform for businesses launching an online store, and the setup process has picked up some genuinely useful additions in 2026 — most notably built-in AI tools that help with everything from theme customization to product categorization.
Shopify store setup gives businesses a straightforward way to establish an ecommerce presence, add products, customize a storefront, configure payments and shipping, and prepare for launch. A successful setup involves more than choosing a theme—it requires thoughtful product organization, clear navigation, mobile-friendly design, secure checkout, accurate store information, and testing before customers begin placing orders.
Before You Start
Decide what you're selling and who you're selling it to before touching the platform itself — this shapes almost every decision that follows, from theme choice to navigation structure. Have your business details ready (legal structure, tax information, and a business address), along with high-resolution product photos if you already have inventory; 1200×1200 pixels is a reasonable minimum for product images that hold up on both desktop and mobile.
Step 1: How to Complete Shopify Store Setup: Create Your Shopify Account
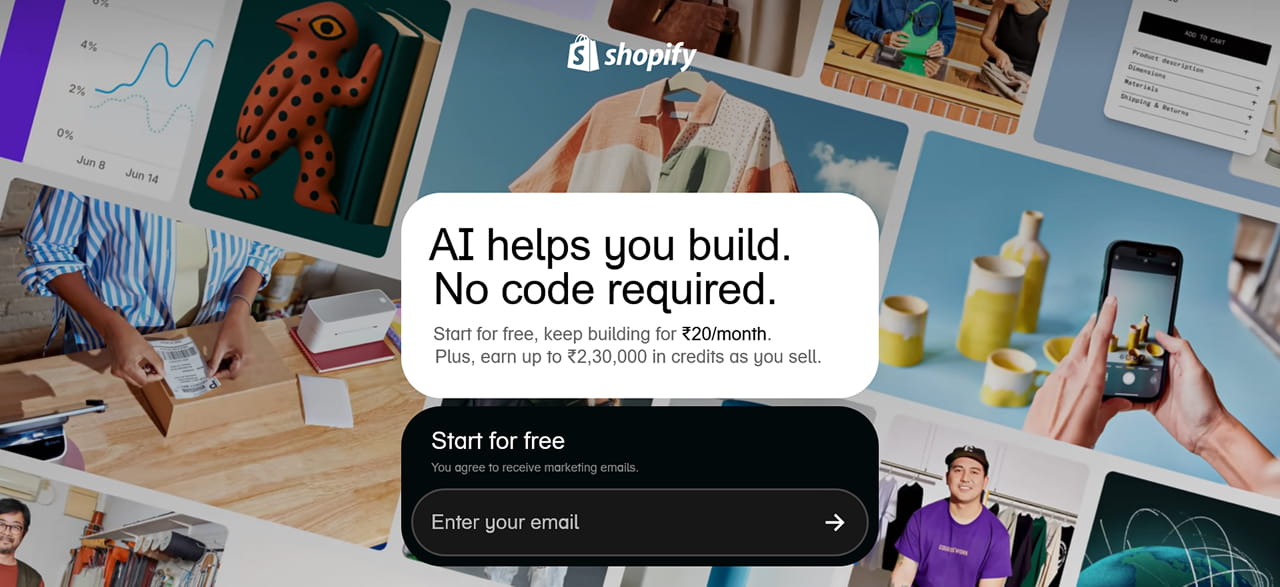
Go to shopify website and start a free trial. Enter your email, create a password, and name your store — this becomes part of your temporary default domain (yourstorename.myshopify.com) until you connect a custom one. Shopify will ask a handful of onboarding questions about your business type and goals; answering these accurately helps the platform surface more relevant setup suggestions as you go, rather than generic defaults.
Step 2: Choose a Plan
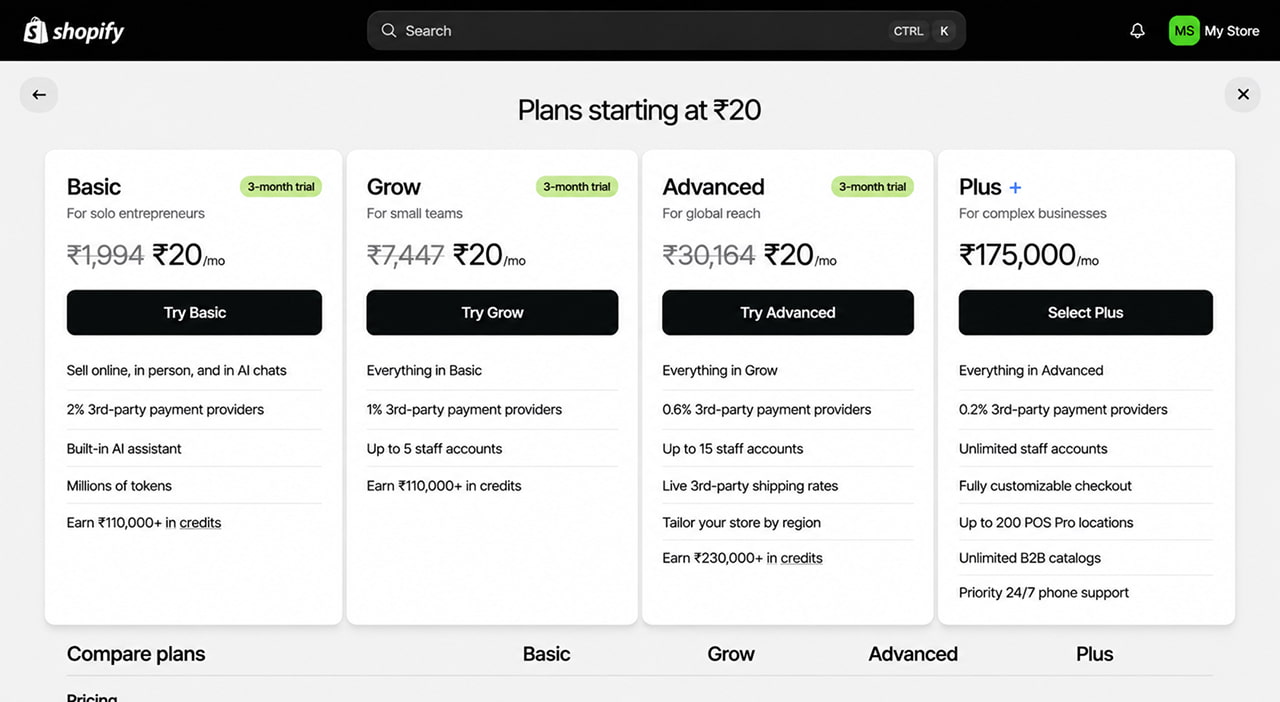
Shopify's plans scale by transaction fees, feature access, and the number of staff accounts included. For a new store, the entry-level plan is usually sufficient to launch and start selling — you can upgrade as order volume and feature needs grow, without needing to migrate anything. There's no reason to overcommit to a higher tier before you have real sales data to justify it.
Step 3: Choose and Customize a Theme
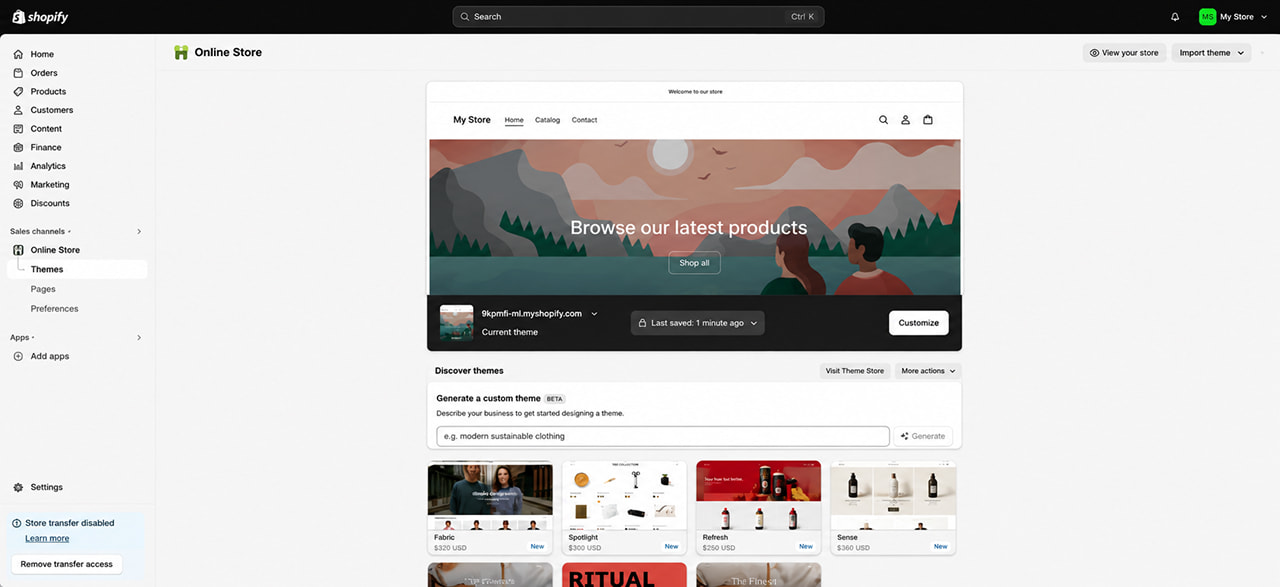
From your dashboard, go to Online Store > Themes to browse free and premium options. In 2026, it's worth specifically looking for themes that support AI-powered product recommendations, integrated video headers, and accessibility features — these have moved from "nice to have" to fairly standard expectations for a professional storefront. Once you've picked one, use the theme editor to upload your logo, set your brand colors and fonts, arrange homepage sections, and build your navigation menu.
Shopify's built-in AI assistant, Sidekick, is available directly from the dashboard during this process — it can suggest layout and color choices, help you locate a specific setting, or generate theme sections based on a plain-language description of what you want. It's a genuinely useful shortcut for anyone customizing a theme without design experience, though final brand decisions are still worth a human review rather than accepting every AI suggestion by default.
Step 4: Add Your Products
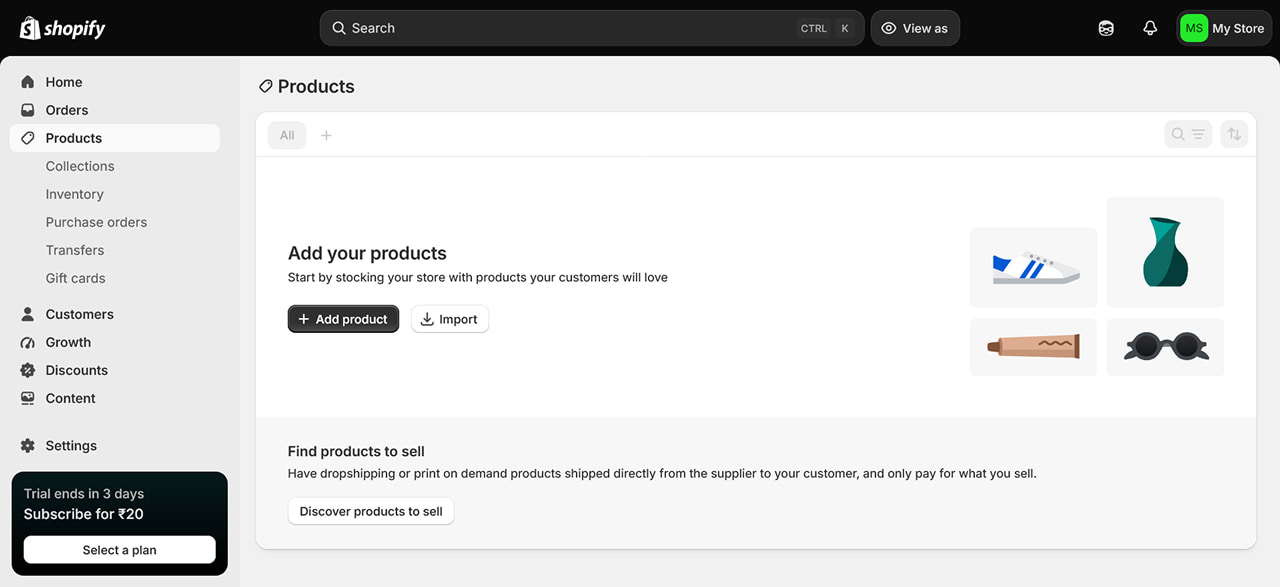
Go to Products > Add product and enter the title, description, images, and any video or 3D media you have for each item. As you fill in product details, Shopify's AI Magic feature will suggest a product category automatically — a small but genuinely time-saving addition, since correct categorization affects both search and how products surface in Shopify's own discovery features. Review the suggestion rather than accepting it blindly, since category accuracy also affects how the product is taxed and shipped in some regions.
Step 5: Set Up Payments
Under Settings > Payments, activate Shopify Payments if it's available in your country, since it's the most straightforward option with no extra transaction fees on top of standard card processing. If Shopify Payments isn't available, or you want to offer additional options, connect a third-party payment gateway. Either way, test a transaction yourself before launch — a broken payment step is the single most damaging thing a new store can have go unnoticed.
Step 6: Configure Shipping and Tax
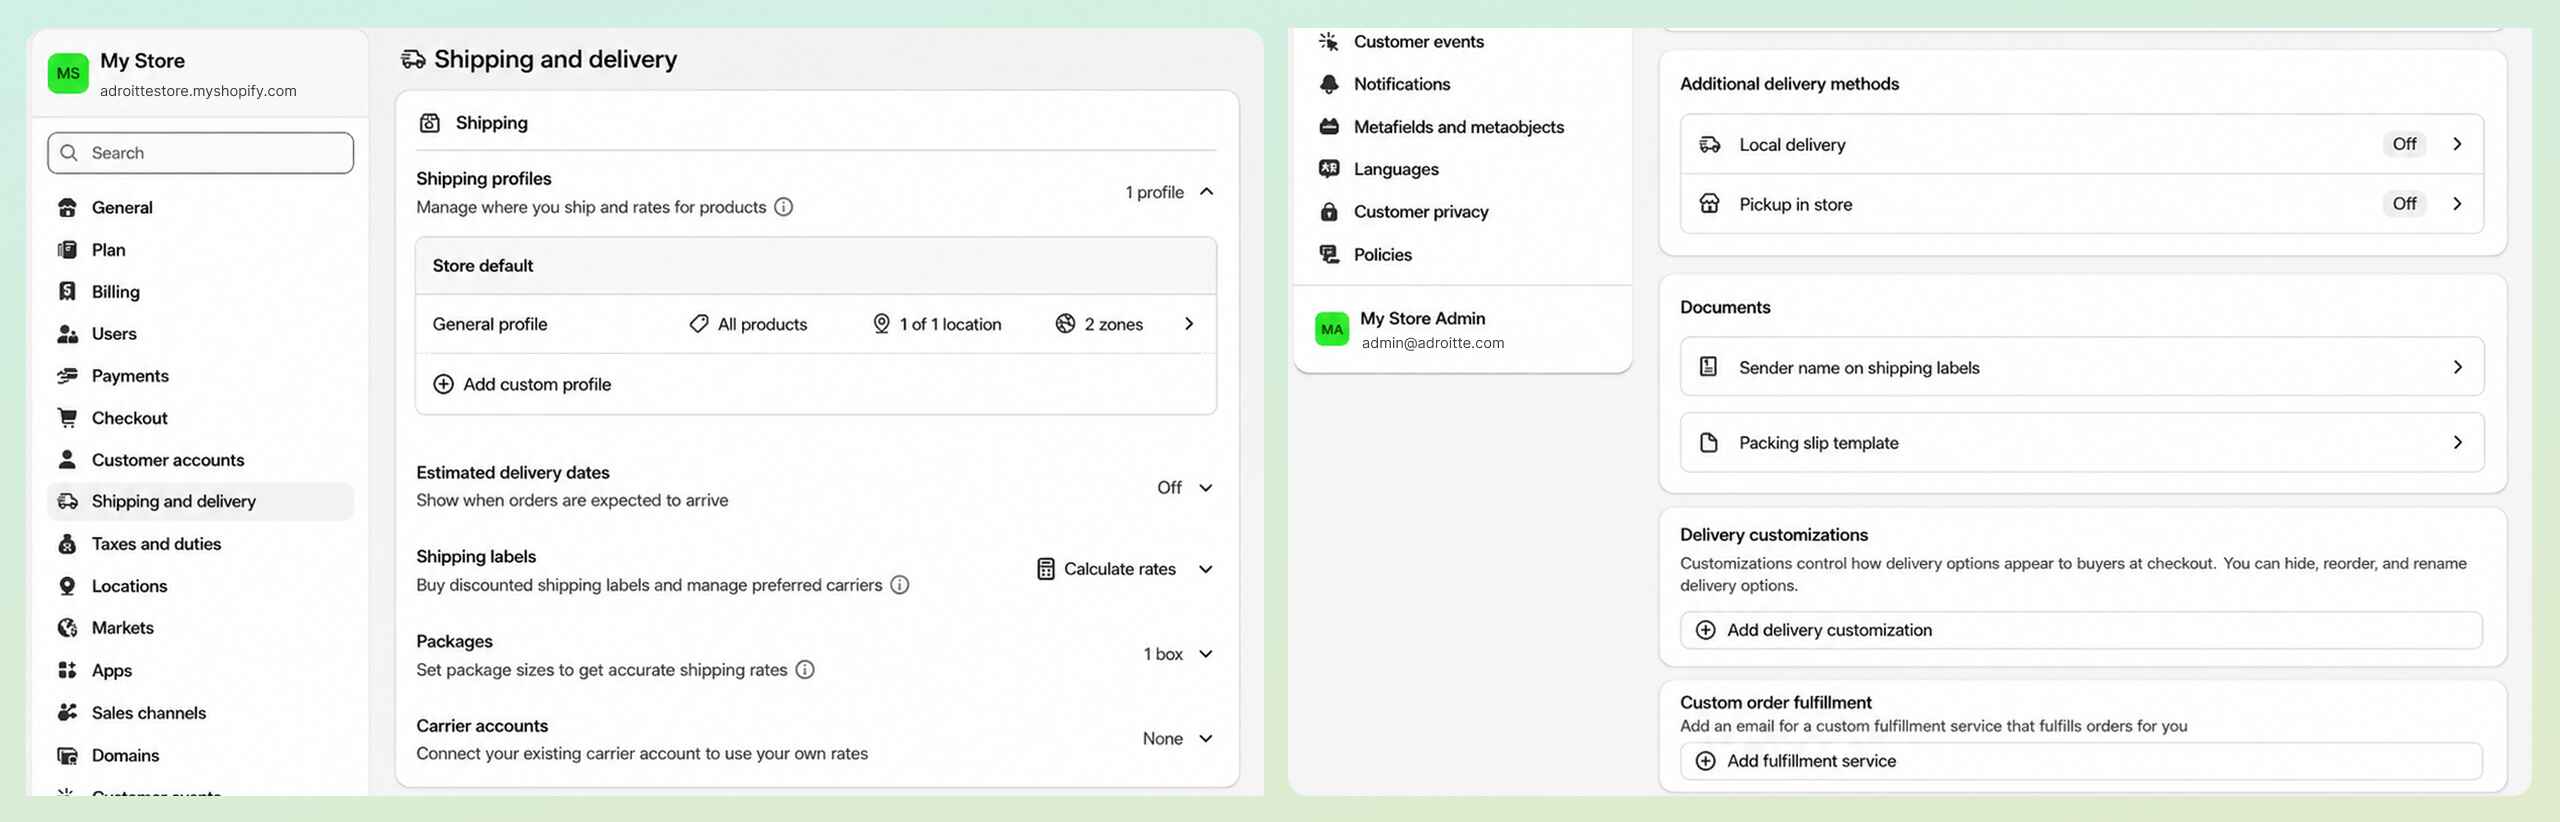
Under Settings > Shipping and delivery, set up your shipping zones and rates — flat rate, weight-based, or calculated rates from a carrier, depending on what you sell. Under Settings > Taxes, configure tax collection for the regions you sell into; Shopify calculates most standard rates automatically based on your store's location and your customers', but it's worth verifying this against your actual tax obligations rather than assuming the default is complete for your situation.
Step 7: Connect Your Custom Domain
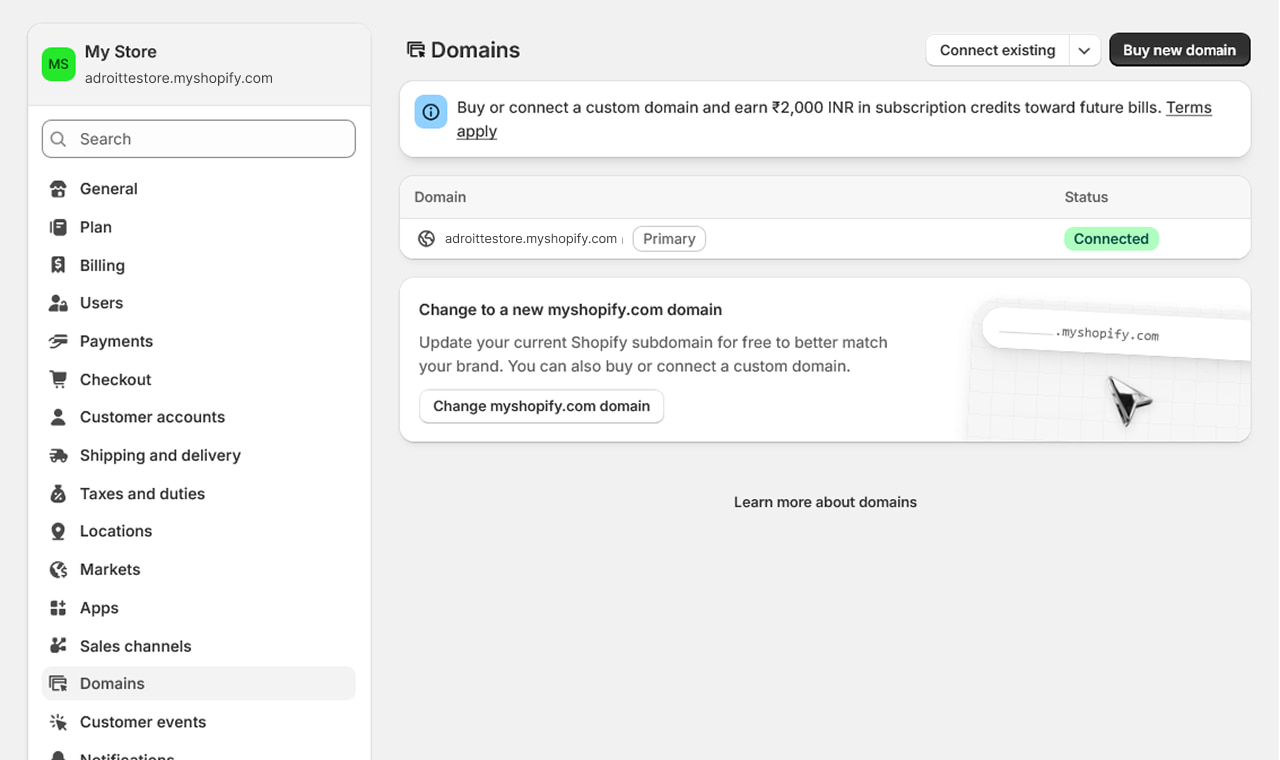
Your store launches on a temporary myshopify.com address, which works for testing but isn't what you want customers to see or remember. Under Settings > Domains, connect an existing domain or purchase a new one directly through Shopify. If you're pointing an existing domain from another registrar, you'll typically need to update DNS settings there so it correctly resolves to your Shopify store.
Step 8: Install Supporting Apps
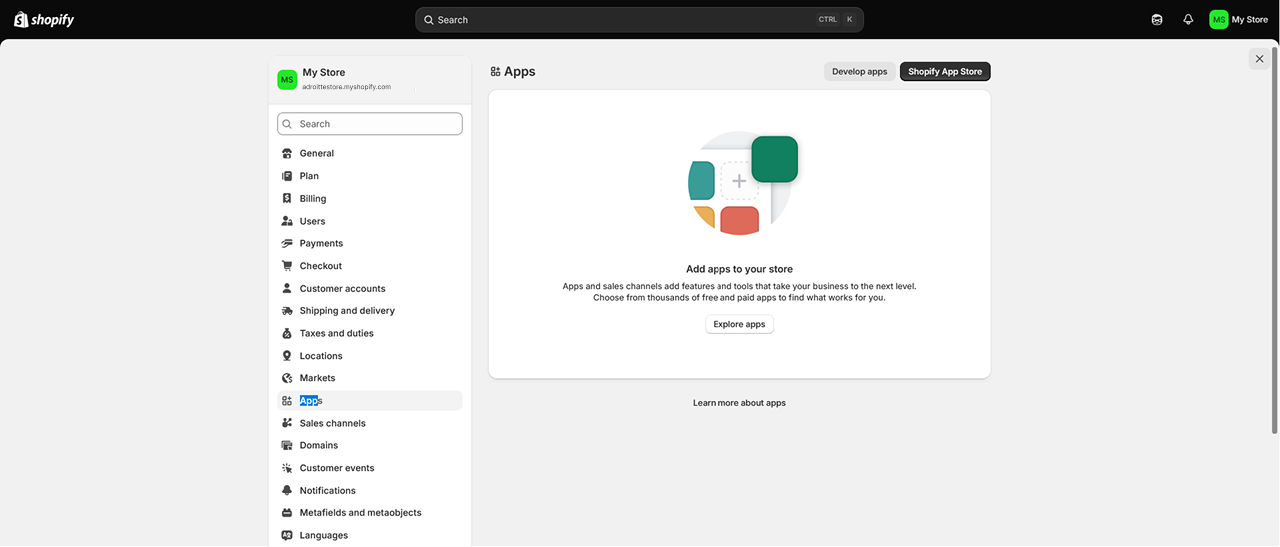
The Shopify App Store covers everything from SEO and email marketing to reviews and upsell tools. Resist the urge to install broadly — a handful of well-chosen apps covering genuine gaps (email capture, basic SEO, reviews) tends to outperform a large stack of overlapping tools that slow the store down and complicate maintenance later.
Step 9: Test Everything Before Launch
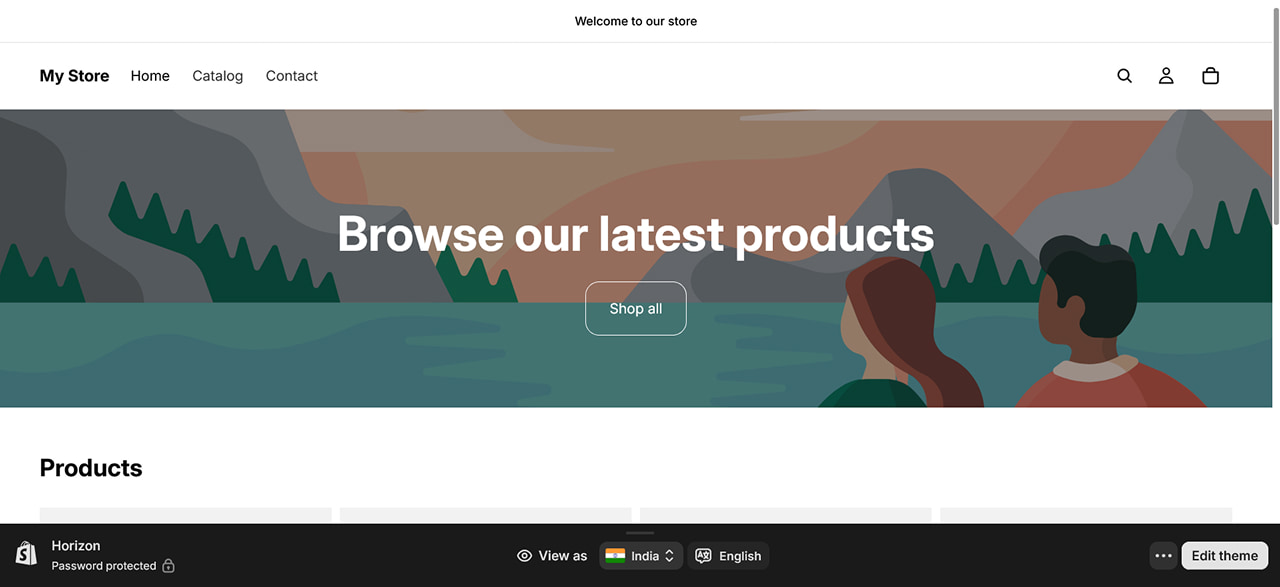
Before making the store public, walk through the entire customer journey yourself: browse products, add to cart, complete checkout with a real (or test) payment, and confirm the order and shipping notifications arrive correctly. Check the mobile experience specifically, since a large share of ecommerce traffic arrives on phones and a desktop-only test misses real problems. Keep a recent backup of your store configuration before making major catalog or design changes, so a mistake during setup is recoverable rather than a rebuild.
Step 10: Go Live
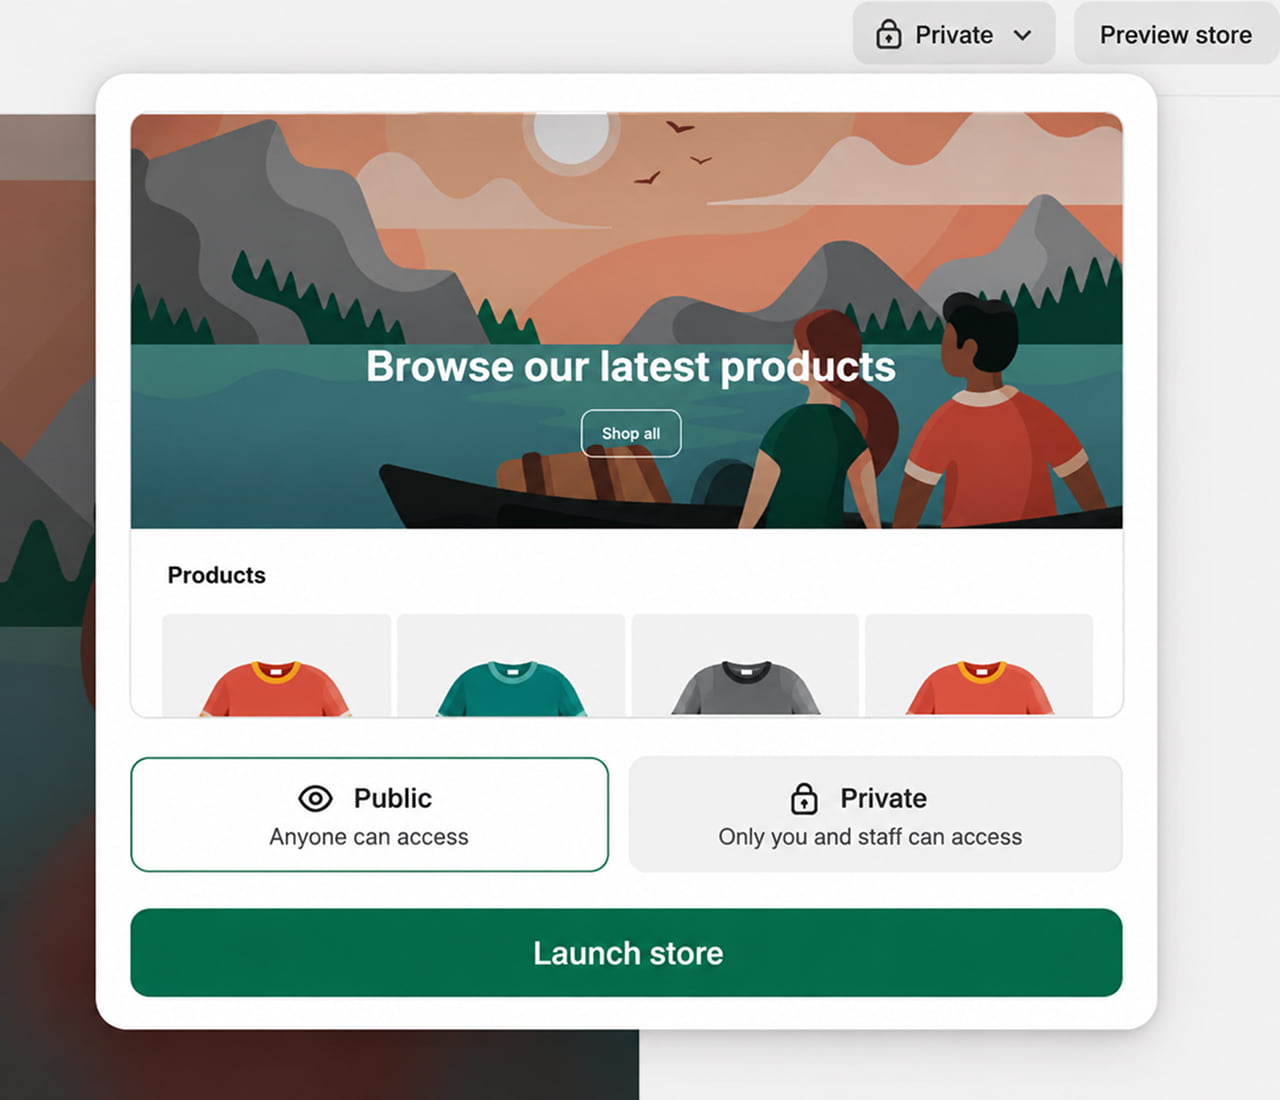
Once everything checks out, remove any password protection that's been active during setup so the store is publicly visible. A soft launch — sharing the store with a small audience before a full marketing push — is a reasonable way to catch usability issues with real traffic before scaling up promotion.
Common Mistakes to Avoid
A few issues show up repeatedly in new Shopify stores: skipping mobile testing and discovering navigation or checkout problems only after customers report them, installing too many apps and slowing the store down, launching without verifying tax settings against actual obligations, and forgetting to remove password protection before a planned launch date. Each of these is a five-minute fix caught before launch and a much bigger headache caught after.
Final Thoughts
Shopify's core setup process hasn't fundamentally changed, but the 2026 additions — Sidekick for design guidance, AI Magic for product categorization, and theme options built around video and accessibility — make it faster to get a professional-looking store live than it used to be. The businesses that get the most out of it still treat AI suggestions as a starting point rather than a finished decision, and test thoroughly before opening the doors.
If you'd rather have a properly configured, tested store built for you, website development services team can handle your Shopify build from setup through launch.
LET'S TALK: BUILD A SHOPIFY STORE THAT'S READY TO SELL
Setting up a Shopify store may look straightforward, but getting all the details right—from theme customization and product setup to payments, shipping, mobile performance, and checkout testing—can make the difference between simply having a store and having one that is ready to convert visitors into customers.
At Outsourced365, we help businesses build and launch Shopify stores that are professionally configured, easy to manage, and designed around the customer journey. Our approach combines thoughtful design with technical setup and thorough testing, so your store is ready to perform from day one.
We can help you:
- Set up and configure your Shopify store from the ground up
- Customize your theme to match your brand and customer experience
- Add and organize products with optimized content and media
- Configure payments, shipping, taxes, and essential store settings
- Connect your custom domain and set up the right supporting apps
- Test your store across mobile, desktop, cart, and checkout before launch
- Maintain and improve your Shopify store as your business grows
If you're planning to launch a Shopify store or already have one that needs a more professional setup, there's no need to figure everything out yourself. Get in touch with Outsourced365 and let's build a Shopify store that's ready to sell.
Outsourced365 Services are designed to help you grow
Contact us Today!
Why Companies Build Websites with Outsourced365
With our web design services, you will get:
- Modern, conversion-focused layouts
- Responsive design across all devices
- Optimized user experience and navigation
- Scalable websites built for growth

Related Posts
See all posts